Baby, It's Cold Outside!

Wednesday, 8 February 2012


My car battery is getting on and, consequently, if the temperature drops below 5c my car will not start.

This is very frustrating because I need to get everyone out the house and in the car by 8.15 and when Mr Wild Ink leaves for work at 6am and there are no residents at home in our village I cannot jump start my car. Every moment of my day is accounted for so this week there is no time to get a battery until the weekend.

Also my washing machine in the shed keeps freezing up so I can't wash clothes for a week AND we've run out of logs.

Normally these things wouldn't faze me but with all we need to do with our house renovation, it's just more things to sort out...

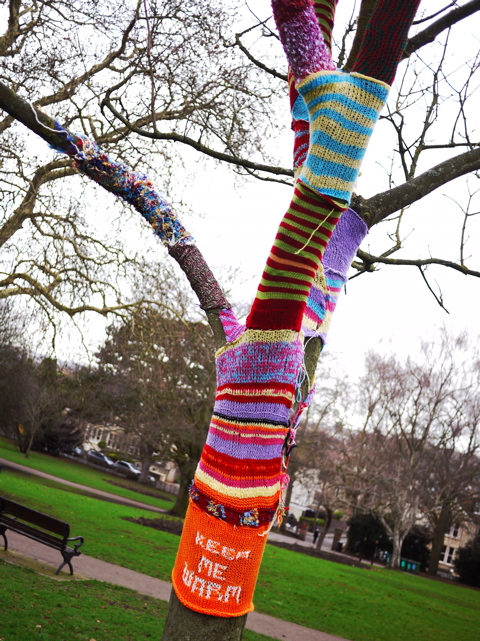
When I sat down (at 11.30pm!!!) last night my heart was warmed by this lovely photo taken by Charlotte. I had a read through her lovely, lovely blog and felt all the stresses of my day unravel.

I then had a little nose at Jane Brocket's fantastic blog which, like all her books, is such a pleasure to read. It's what I love about blogging... reading a snippet of someone else's life. A guilty pleasure for me, like eating chocolate...but low in fat!

Decorated Dispatch

Saturday, 4 February 2012

It is quite quiet on the Wild Ink webshop which I don't really mind at the mo. Things are so busy with our house renovation that I don't think I'd cope if things went manic on notonthehighstreet too. I am doing 'steady' business, though, and still get so excited that people want to buy the things I make!


I've always loved receiving something exciting through the post and believe that an envelope should always look enticing so consequently put loads of effort into the package I send off to my lovely customers.

I went to an exhibition years ago which was all decorated envelopes. They had been illustrated by an artist and sent to her daughter whilst she was studying at university and each one really was a work of art and a joy to behold. How exciting to receive something so beautiful! I can't dedicate that much time to each of my envelopes but I hope that they make the recipient smile and hint towards the delightfully handmade contents!


Crayola Pen Lettering

Wednesday, 1 February 2012


Life's been super busy over the last few months and it's all coming to a head with our house renovation so we feel like we're overwhelmed with 'THINGS TO DO'. There is little time to put aside for creative projects so small moments of inspiration seem all the more exciting.

The little girl LOVES colouring and will spend hours carefully staying in the lines but only ever colours with one colour. A fairy, for instance, will be have a purple dress, face, wings, hair, shoes etc. Consequently the pens run out really quickly and are no use to anyone right? Wrong!! I was messing around with the rejects before they went in the bin and created some really exciting lettering. It looks a bit like brush lettering but was much easier to produce as the pen tip is much firmer than a brush.

The brilliant thing about these Crayola pens is than if you turn them on their side you get a really thick mark but holding them upright gives you a thin line. When they run out a bit they give a fantastically distressed look. To create this lettering you need to use the pen on its side (with pressure) for the thick 'down' stroke and on it's upright point for the 'up' stroke.

Quickie Homemade Card Idea

Thursday, 19 January 2012


Sorry about the terrible photos, I had my camera on the wrong setting!

Here's a really easy card idea and you can base it on your own everyday capitals. It's easy because if you leave any letters out or your layout doesn't fit, you can just slot in a letter here and there and your recipient will think that you are very arty and creative (rather than forgetful and /or illiterate).

This is an excellent card for any occasion: a birth/birthday for anyone, christening, new house, good luck or perhaps two names for a wedding card. It doesn't need to look exactly like this as it's a design and technique which is flexible. Try doodling a few ideas with a biro next time you're on the phone and you will end up with interesting variations.

You need: A blank piece of card folded (a square looks good ) and a set of good quality colouring pencils (or just a few colours). I like to use high quality watercolour pencils because the pigments are a lot brighter.

1. With clear and simple capitals write your name/s, words, message. I have adjusted my capitals subtly by lowering the cross bar of the A and H and stretching out the O. You could use a square layout like this or just write it in a line.

2. Add weight to your letters. An even weight is easy to achieve especially with a really sharp pencil. Emphasise the beginning and end point of each letter by drawing a little line. Or draw a bigger line a create a serif, perhaps?

3. With a different colour draw the shapes which fit in between the letters leaving a little white outline space between the shape and the letter and then colour in...and who doesn't like a bit of colouring..but remember to stay in the lines!

4. For a slightly posher finish colour the inside shapes again this time adding a bit more pressure around the outside of the shape which will really crisp it up. Then lightly colour again with a slightly different colour. Purple or pink looks interesting over blue, orange and red also look good together.

Finally, add a few embellishments like hearts, stars, little bird etc.

Tea Staining Paper

Tuesday, 17 January 2012


As far as I'm concerned you cannot beat a paper based craft especially one which uses bog-standard white printer paper. Anything you've got knocking about would do really including lined paper, junk mail, old letters etc. I've photocopied some handwriting on to an A3 sheet of white paper and this looks really effective.

It really couldn't be more simple.
1. Add a teabag to a small bowl of boiling water and brew for ages, the longer you brew the darker your stain. I allowed it to brew until the tea bag was cool enough for me to handle.

2. Squeeze the teabag out directly onto the paper allowing the tea to pool and rub it all over the paper using the teabag or, if you're doing a lot of staining, some cotton wool. (The teabag bursts after about four sheets)

3. An Aga is perfect for drying your paper on but if, like me, you're not blessed with such a beast then a hair dryer is very effective. On a hot day you could peg your paper to the washing line which would look interesting and your neighbours would think you've gone mad but 'hey ho'. Hanging up wet stained paper creates a drippy effect which is quite fun.

4. Make something lovely with it. You could cover a box, make a book cover. tear it up to use for scrapbooking or ...make a flower.

A Lovely Birthday

Thursday, 12 January 2012


I had such a super day today, quite busy, but absolutely lovely.

Roses, chocolate, a fresh cream cake, little parcels, big parcels, sunshine, rustling leaves, a cup of tea, a brownie, friends, family, homemade cards, wrapped up silver dressing up shoes, birthday kisses. xx

A Cut Paper Paradise Part 1

Friday, 6 January 2012


I blame my current paper obsession on Sarah Morpeth and her wondrous works of papery art. Mr Wild Ink bought me one of her 'hedgerow' Pamphlet books for christmas and I can't stop gazing at it. I'm quite fussy and hard to please when it comes to such things yet all the subtle little cuts and shapes are a joy to behold.

I've found her website really inspiring with cut and folded books which literally look like they are exploding with foliage and wildlife. I realise, being an arty bod, that Sarah's work is thoughtful and conceptual on many levels and she clearly takes inspiration from lots of sources. I particularly like her works influenced by the natural world and, concepts aside, they are visually very impressive.

Wild Ink All rights reserved © Blog Milk - Powered by Blogger